Using bricks with the original factory names where they were produced adds unique character and charm to the window sill.
🧱 Brick Restoration and Repair
Cegla Workshop offers professional services in the restoration and repair of old brick masonry. Choosing our team means ensuring long-term durability and expert craftsmanship. We guarantee the quality of our work and the lasting structural stability of your walls after restoration.
Before starting any brick replacement or surface repair, we perform a thorough structural assessment. Our specialists evaluate the scale of the damage, locate hidden defects, voids, and cracks, and identify the root causes of deterioration. In most cases, these issues arise due to improper maintenance by previous owners, foundation settlement, or prolonged exposure to aggressive environmental conditions.
Restoration work begins only after all necessary measurements are taken, the condition of the masonry is analyzed, and the project is fully coordinated with the client. Our workflow typically follows this order:
-
selective brick replacement and various types of masonry restoration
-
cleaning of brick walls
-
repointing and joint restoration
-
moisture protection and waterproofing
-
finishing with varnishes or natural oils
At Cegla, you can order the restoration of both vertical partitions and structural features such as door and window openings, facades, interior brickwork, arched ceilings, and fireplaces.
How much does it cost?
The final price depends on several factors: project scale, bricklaying method, and the level of complexity. That’s why we provide an accurate quote only after a detailed inspection and assessment of the scope of work.
Brick Replacement and Masonry Restoration Process
During the restoration of old brickwork, the condition of the wall is assessed twice.
🔹 First assessment takes place during the initial inspection — large, visibly damaged areas are immediately identified, and restoration begins with those zones.
🔹 The second assessment happens after the wall is fully cleaned of old mortar or plaster. At this stage, minor defects may become visible that were previously hidden.
To avoid the need for repeated cleaning, we recommend preparing a reserve supply of cleaned bricks in advance. These can be used to fill newly exposed, minor damaged areas — typically requiring 2–3 bricks per patch, often referred to as a “nest.”
This careful two-step process ensures no detail is missed and allows for both visual consistency and structural integrity in the restored masonry.

View of the wall before restoration

A wall with deteriorated brickwork.

Brick wall prior to restoration.
Exploring Common Types of Brick Replacement in Restoration
In masonry restoration, brick replacement (selective removal and insertion) is one of the most frequent and essential tasks. We begin every project with careful selection of matching bricks — paying close attention to both color and size.
To ensure an authentic result, each brick is laid with proper bonding and aligned with existing mortar joints. When performed correctly using a mortar color that matches the original, it becomes nearly impossible to tell which bricks were replaced.
Below, we’ll describe the most common types of brick replacement we encounter during restoration work — from single patching to more complex bonding patterns.
Restoration of Brick Arches and Lintels
In many cases, severely damaged brick lintels or arches cannot be restored and must be completely rebuilt. The approach depends entirely on the condition of each individual element and is determined only after a thorough on-site inspection.
There are various types of lintels and arches used in historic brick construction, including:
-
single-brick (1 brick wide) lintels
-
1.5-brick and 2-brick lintels
-
segmental (arched) lintels
-
flat arch or keystone lintels (klinets type)
-
and other traditional forms.
Proper assessment and historically accurate reconstruction techniques are essential to preserve both the structure’s integrity and its original appearance.

Brick wall before restorationBrick lintel re-built on the site of an old restoration.

Restoration of a brick arch

Rebuilding Brick Arches Indoors: Traditional Techniques
When a lintel or arch needs to be reconstructed inside a building, we follow a time-tested method based on historical craftsmanship.
First, we trace the original arch radius (known as the “live” arch) from the existing structure. This shape is then used to create a wooden arch formwork, or centering template (kružalo). The new arch is built directly on this form.
Masonry is laid symmetrically from both sides toward the center, so that the final brick placed is the keystone that locks the structure. A guide line (string) is stretched for accuracy, and experienced masons calculate the exact number of bricks in advance, marking their placement on the template to ensure perfect symmetry.
Before work begins, the ceiling above must be unloaded, and pressure on the arch zone relieved to avoid additional stress during reconstruction.

Repair of brick lintel

Restoration of soffits and lintel, with ceiling support
Restoration of Window and Door Reveals
Altering wall openings in existing buildings is a common practice in architectural renovation — and one in which our team has significant experience.
We specialize in the restoration and rebuilding of door and window reveals, using original brick or reclaimed materials to maintain stylistic unity with the rest of the masonry.
Whether you need to resize a doorway or adjust window reveals to match a new layout, our craftsmen will deliver durable and visually consistent results.
New reveals can help solve space-planning challenges while preserving the charm and authenticity of brick architecture.

Restored brick reveal
Restoration of Window Reveals Using Reclaimed Brick
A key design element in any loft-style interior is the brick window reveal. In most cases, clients choose to keep at least one exposed brick wall — usually the one with the windows. That’s when the question arises: what to do with the reveals, and what are the options?
Brick reveals can be styled in different ways:
-
Single-step reveals (see photos 1 and 2)
-
Flat reveals (photo 3)
-
Flat reveals can also be angled outward (with daylight slope) (photo 5)
-
They may extend over the window frame (photo 4) or end flush with the opening
-
And sometimes, before people visit our site for inspiration, they simply plaster them over (photo 6)
Feeling confused by the photo examples? Don’t worry — we’re here to help you choose the right style that fits your space and preserves the charm of the original brickwork.

Brick window reveals with a plastered step

Brick window reveals with a step
Let’s take a look at the photo examples of flat and angled brick reveals with a daylight slope.
They can be:
-
Flat — either overlapping the window frame or ending flush
-
Angled (sloped) — also with or without overlap onto the frame
See the photo gallery below for visual references.

Photo 3: Straight brick window reveals without overlap onto the frame.

Photo 4: Straight brick window reveals with overlap onto the frame.

Photo 5: Angled brick window reveals with overlap onto the frame.

Photo 6: Plastered brick window reveals.
If you’re feeling unsure, check out our detailed video review on brick window reveals in historic buildings.
We made this special video to help you better understand the options and choose the right style for your space.
Restoration of Chases and Concealed Utilities in Brick Walls
As part of our comprehensive brick restoration services, we also handle the installation and integration of engineering systems within brickwork. This process allows you to discreetly hide plumbing, wiring, and other utilities inside solid masonry walls.
Need to neatly route a pipe, install a flush-mounted outlet, or conceal electrical lines without disrupting the historical character of the space? That’s exactly what we do.
We don’t reveal all our techniques — but you can explore the quality of our work in the photo gallery below.

Example of work: Before embedding the pipes.

Completed work: view after project completion.
The same can be done with electrical wiring.

Example of wall restoration after electrical work. Before the restoration began.

Example of wall restoration after electrical work. After completion.
Running wires or pipes through a brick wall? No problem!

Example of pipe outlet installation in a brick wall.

Example of pipe outlet installation in a brick wall — finished result.
This is how it looks after the restoration:

Example of a finished pipe outlet from a brick wall

Example of a finished pipe outlet from a brick wall
Window Sills Made of Reclaimed Brick
This element refers to finishing details in masonry or decorative work. Reclaimed brick sills can be crafted entirely from stamped bricks or combined with other elements to create a partially brick-based finish.
They add a strong architectural accent and complement both interior and exterior brick walls — ideal for historical restorations or loft-style spaces.

Window sill made of reclaimed brick with stamps

Window sill made of reclaimed brick with stamps

Beautiful window sill made of reclaimed brick

Brick window sill combining stamped and plain bricks
Brick Wall Cleaning
Once all masonry work is complete, the walls can be cleaned of residual paint, lime, and other debris left on the brick surfaces.
We’ve gained extensive experience and invested in advanced equipment that allows us to clean thoroughly and gently — without damaging the historic bricks.

rick wall after plaster removal

Example of a wall after brick replacement and cleaning
Example of Wall After Brick Replacement and Cleaning
Cleaning old brick walls is a dust-intensive process that requires careful execution. For health and safety, all work must be carried out with proper respiratory protection. This ensures both the preservation of the brick surface and the well-being of the craftsman during restoration.

Before wall cleaning
After all discussions and approvals, our craftsmen carefully clean the bricks from old lime mortar.
This stage is considered one of the most important and challenging — it requires both endurance and true craftsmanship.

Example of a wall after plaster removal

Example of a wall after brick cleaning
Brick Joint Restoration
Mortar joints are one of the most important decorative elements in any brick surface. Even visually imperfect or aged brickwork can become attractive and expressive when the color and texture of the joints are carefully selected and skillfully applied.
Proper jointing enhances the tone of each individual brick, gives the wall a refined, finished look, and creates a cohesive architectural impression. That’s why this task should always be entrusted to experienced professionals.
With expert craftsmanship, it’s even possible to visually correct uneven masonry through jointing techniques. But if the job is handled by amateurs, don’t expect the same high-quality result.

Example of joint restoration work in an apartment within a historic building
Joint raking is also often a dusty process, which — like brick cleaning — becomes very meticulous and labor-intensive in enclosed spaces.

Expanded joints on a brick wall
Caulking refers to the final stage of finishing work.
The entire surface is carefully cleaned of dust and any remaining lime residue on the bricks. Then, both the walls and joints are washed and prepped.
A suitable grout or pointing mortar is selected, and craftsmen have the option to choose the perfect color from a wide palette of shades to match the desired look.
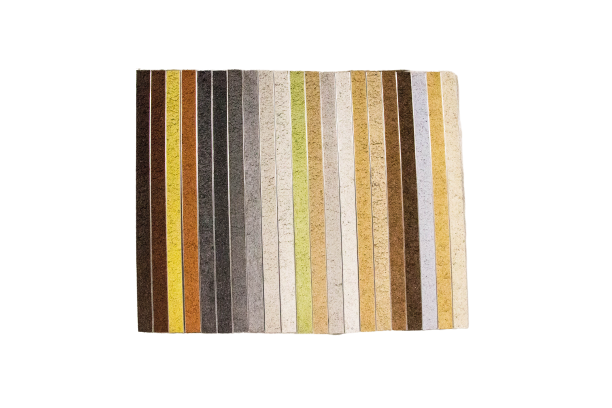
A palette of mortar colors to choose from
We offer our clients the option of a complete replacement of all mortar joints.
You can also choose the preferred type and style of brick jointing.

spoiny murarskie
Brick Joint Sealing and Repointing
During joint sealing, every step is carried out with extreme care, especially around corners, where precision is key.
Joint sealing is already included in the cost of restoration work involving brick replacement, so there’s no need to pay extra.
However, if the wall itself is intact but the joints are loose, crumbling, or missing, it’s essential to have them repointed.
If this is not done in time, the degradation will spread and ultimately lead to damage of the brickwork.
Loose joints not only threaten the wall’s structural integrity but also cause dust to fall off, meaning the space will require more frequent cleaning.
But when freshly repointed, brick surfaces:
-
look raw, beautiful, and elegant
-
add a strong visual identity to the space
-
become a highlight within the interior
-
reflect the owner’s taste and attention to detail
-
last longer without the need for expensive renovations
Properly sealed joints can also help visually correct uneven brickwork, restoring balance to even the most irregular walls.
Sometimes, old joints leave behind smears on the bricks (“mortar streaks”), or in other cases, there’s no joint line left at all.
Only when the mortar lines become clean, uniform, and refined — the work is truly complete, and the result becomes strikingly beautiful.

Finished wall

Example of a wall before restoration work began
View of the wall during the work. The importance of joints can be clearly seen.

Example of a wall after brick replacement and sealing of new joints
Brick Moisture Protection
Brick is a naturally porous material, which means it easily absorbs moisture from the environment.
This property can negatively affect its performance and appearance over time.
Excessive moisture causes the brick to gradually lose its vibrant look, become dull, and start to deteriorate.
Importantly, it’s not just external walls that are at risk — interior brick surfaces are also vulnerable to damage caused by water and humidity.

Surface treatment with water repellent. The left side is untreated, the right side is protected.
To preserve the beauty, strength, and durability of the material, we always apply proven water-repellent treatments and special sealants to restored surfaces.
Walls treated with such protection are effectively shielded from moisture-related damage, ensuring they remain intact and visually appealing for years to come.

The shower walls are made of reclaimed brick and treated with a water-repellent solution.
Coating Brick Walls with Varnish, Oil, or Paint
One of the most effective ways to enhance the durability and aesthetics of brick walls is by applying protective coatings such as varnish, oil, or paint.
It’s essential to choose finishing products that highlight the natural beauty and character of reclaimed brick. That’s why we also assist in selecting the best finishing materials for each project.

A treated reclaimed brick with a visible stamp, varnished to create a “wet stone” effect.
Before applying any finish, we recommend creating a test sample in a hidden area to evaluate the expected result.
Once the test area meets expectations, we proceed with coating all approved surfaces using the selected varnish or finish.

Varnished wall after completion of all restoration work.
This is the finish line — and it will bring joy for many years to come!
We also carry out heritage restoration projects and repair emergencies in historic homes.
Examples of our work:

Before the start of work. Damaged interior partitions.

Restored partitions.
Restoration of a heritage building.

Example of brick façade restoration and reconstruction of openings.
You can find more examples of our work on our Instagram page.
We are proud of the projects shown in these videos — take a look!
Want to order brick restoration or repair services?
Write to us at ceglaweu@gmail.com — we’ll be happy to help!